Showing posts with label gluten free. Show all posts

Monday, 24 August 2015

Macadamia and Brown Rice Cookies

Biscuits are so much fun to invent!  Mainly because I find them quite forgiving and it is hard to go wrong when making a biscuit recipe.  Even if they don't turn out exactly as they should, unless you burn the life out of them, they wont suffer from issues such as sinking in the middle or not rising as commonly occurs with cakes or other demanding delights!
These filled our house with such wonderful aromas - macadamias toasting, a subtle hint of vanilla and that delicious buttery goodness!
Whilst they won't be able to set foot in the lunchbox (unless your school doesn't follow a nut free policy!), there are plenty of other occasions for these maca treats - after school snack, morning tea at the office, a gift to show someone you care, road trips, and the list goes on!
I'm sure other nuts will work too, although there is something that works so beautifully with butter and macadamias! Not to mention the fact that Macadamias are indigenous to Australia - with growers spanning from the east coast of New South Wales right up to the far north of sunny Queensland!  Please ensure that when you buy your macadamias, support our local industry and Buy Australian!

If you are using a Thermomix and raw brown rice, you'll get a little crunch in the bikkie which adds to the experience although if you prefer a really smooth result, once you grind the rice you could always sift it to remove the gritty bits.
These are so quick and easy to make with simple ingredients, it really isn't necessary to buy packet biscuits!  Avoid those processed ingredients, make a double batch, and freeze half for another time when the doorbell rings unexpectedly!
Enjoy...

Macadamia and Brown Rice Cookies

Ingredients

100g raw brown rice (or brown rice flour if not using a TMX)
100g macadamias
100g gluten free self raising flour
65g rapadura sugar (coconut sugar, brown sugar, or raw would also work)
55g unsalted butter, cold
1 tsp vanilla extract

Method - Conventional

  1.  Preheat oven to 180 degrees celcius.  Line two baking trays with baking paper.
  2. Add the macadamias to a food processor and pulse until a fine meal is achieved.  If you do not have an appliance to do this, finely chop the nuts.
  3. Place brown rice flour, macadamias, SR flour and sugar into a bowl or food processor and combine.
  4. Add butter and vanilla - either pulsing in food processor until mixture holds together well when pressed into a ball, or mix through butter and vanilla with fingertips until butter is evenly distributed through the mix and then stir well until mix holds together well when pressed into a ball (this will take a bit of elbow grease to get a moist dough!).
  5. Press tablespoons of mixture into balls then gently press down with a fork to flatten slightly.
  6. Bake in preheated oven for approx 15 mins (checking regularly after 10 minutes as all ovens are different) or until golden brown.
  7. Allow to cool completely on tray before storing in an airtight container. 

Method - Thermomix

  1. Preheat oven to 180 degrees celcius.  Line two baking trays with baking paper.
  2. Place rice in TM bowl and grind on speed 10 for 1 minute.
  3. Scrape sides, add macadamias to ground rice and process on speed 7 for 10 seconds.
  4.  Add flour and sugar and mix on speed 4 for 5 seconds.
  5. Add butter and vanilla and process on speed 5 until combined (approx 20-30 seconds).  Mix should come together into a ball easily.
  6. Follow steops 5-7 above.

Wednesday, 8 July 2015

Date & Coconut Slice with Lemon Icing


Some of my favourite moments these days involve spending time with good friends.  I treasure it now more than ever before, and consider myself so very lucky to have such dear friends with whom I can cry with, laugh with, bounce ideas off, and solve the worlds problems with!  But most of all just that companionship, that understanding (even when we may see things differently), that support and knowledge that someone is really there for you - as much as you are there for them.  I mean, you can't trivialise that.  That true friend is often years in the making, or sometimes not many years at all.  But either way, it's a precious thing I have in my life, and I try not to take it for granted, ever.
So this is to you, my dear friends.  You know who you are.  You are special to me and I thank you for giving me such richness in my life.  I try hard to give that back to you.  Here's to you and me, and the good times we've had, and the good times that lay ahead.  The greatest way I give love is through food.  And here is some love in a slice!  How lovely it would be to know that this slice created another special moment between two good friends.  Enjoy...


Sunday, 5 July 2015

Roasted Tomato and Capsicum Soup

Over two years on and my Thermomix still never ceases to amaze and impress me!
Today I scored just under a kilo of deliciously juicy and sweet tomatoes and two large red capsicums.    Soup came to mind straight away, but generally with homemade tomato and capsicum soup you would need to remove the skins in most recipes.  And anyone who knows me knows that those kind of tedious steps in a recipe really turns me off!!
Well I decided to put my trust in the power of the TMX and ditch the skinning step - and I'm here to tell you the TMX made light work of those pesky skins!  Blitzed them right into oblivion!!  The end result was smooth, yet layered with a complexity of flavours coming from the roasting.  The sweetness of the tomatoes, capsicum and garlic shone through, complemented with a slight smokiness, the richness of the olive oil, then cut through with the fresh basil and cracked pepper.
A solid entree or even hearty lunch with a chunk of fresh bread, this soup will surely impress its recipients, but most of all, it impresses the cook, because in just two simple steps and as many dishes, you are done and dusted and free to entertain in front of the crackling fireplace; glass of wine in hand, cracker of a soup at the ready!  Now what could be better than that in the dead of winter?!
Enjoy....

Thursday, 21 May 2015

Carrot & Pecan Brownie Topped with Lemon Curd

 Half a lemon each, a spoon in hand and the sugar jar in our lap.  Sitting on the trampoline on a warm summers day is a distinct memory of my cousin and I many moons ago.  Two girls.  Footloose and fancy free.  The warm breeze in our hair. Chatting about everything and nothing.  Our dreams, our friends, the big issues.  All the time in the world.  A sprinkling of sugar, a taste of the sweet juice, another sprinkling of sugar, and on it would go!  Where did that time go?

I love love love lemons!  Lemon juice, lemon water, lemon cake, lemon slice.
Lemon lifts.  Lemon builds.  Lemon cuts through sweet and salty.  Lemon adds another dimension.

Sunday, 15 March 2015

Chocolate Zucchini cake/muffins - Gluten free, nut free, dairy free

My chocolate and beetroot fudge cake has proven to be a huge hit, both amongst friends and family as well as on this blog!  The benefits are not having to cook the beetroot before cooking, and of course sneaking vegetables into a decadent chocolate cake makes eating one slice too many almost acceptable!

Well, here is another option of adding a vegetable to a chocolate cake, no-one any the wiser! 
I'm not suggesting this as a way to get vegetables into your children and to therefore serve it next to their pork chop on the dinner plate!  But actually the zucchini creates a beautiful moistness in this cake, and if that can be done from a vegetable, why not!

Friday, 3 October 2014

Blood Orange Tart with an almond base - Gluten Free

There's something really exotic and mysterious about blood oranges.  Is it their unusually short harvest season (approx 2 months) that creates a sense of urgency and desire? Their stunning and unique flesh colours?  Or the beautiful flavour combination of both citrus and raspberries?  Either way, I absolutely love seeing blood oranges hit the markets and always stock up to make as many treats as possible!
This year I couldn't go past blood orange sorbet.  The colour is striking and the flavour sharp and citrusey yet refreshing!  Making sorbets in the Thermomix is oh so easy that it is almost worth buying one for that benefit alone!
Blood Orange Sorbet made in the Thermomix
But with a bowl of sorbet chilling in the freezer I still had a lot of blood orange quarters peeled and pipped and waiting for another creation.  So a blood orange tart it was!  I was looking for a decadent tart yet something quite light in texture to ensure the citrus notes were not drowned out.    And of course I find it hard to create anything without a touch of nutrition added, and so almonds and chia were made a part of the base and I stuck to minimal sugar and the lesser processed rapadura at that.
You need to excuse my pictures, as per usual, as I am far from a good photographer but take my word for it, this tart was YUM!!
One of the best features of this recipe is the requirement for just one bowl, whether it be a TMX bowl, a food processor bowl or the old traditional, well, bowl!  Serving this up at the table in front of friends will be sure to impress, and yet you needn't disclose the minimal fuss you have gone to!  I won't tell them if you don't!
Make it the day before to let the flavours settle if time allows, and serve up with anything from a reduction of extra blood orange juice, double cream, vanilla ice cream, segments of fresh blood oranges or indeed a scoop of homemade blood orange sorbet.  Enjoy...


 Blood Orange Tart with an almond base (gluten free)

Ingredients

BASE
100g butter
100g raw almonds (or almond meal if you don't have a processor to mill almonds)
200g gluten free plain flour (I used Orgran brand)
40g rapadura or coconut sugar
10g white chia seeds
1 egg

FILLING
300g blood orange flesh (skin, pith and pips removed)
100g rapadura or coconut sugar
2 eggs
180g cream
1 heaped teaspoon gluten free cornflour

Method - Conventional

  1. Preheat oven to 170 degrees celcius.  Lightly grease a 24cm shallow pie case with a removable base.
  2. For the base, if you are using a food processor, add almonds and chia seeds to the bowl and process on high speed until a meal consistency is achieved. 
  3. If not using a food processor, place almond meal, chia seeds, sugar and flour in a large mixing bowl.  Add butter and work through with finger tips until mixture resembles bread crumbs.  Add beaten egg and work through until mixture comes together.  Continue at step 6.
  4. Add butter, sugar and flour and process just until mixture resembles bread crumbs.
  5. Add the egg and pulse until just combined.  
  6. Press mixture evenly into pie case both into the base and the sides.  Place on a baking tray for stability and blind bake in preheated oven for 20 minutes.  Remove from oven and set aside.
  7. For the filling, add orange flesh and sugar to the food processor bowl.  Blend until fine pulp is formed.
  8. Add remaining filling ingredients and process until smooth and well combined.  
  9. Pour over base and bake in oven for 30 minutes or until set.  The filling will still wobble when you move it however is actually set.
  10. Allow to cool to room temperature before storing in fridge.

Method - Thermomix

  1. Preheat oven to 170 degrees celcius.  Lightly grease a 24cm shallow pie case with a removable base.
  2. For the base, place almonds and chia in the TM bowl and mill on speed 10 for 10 seconds.
  3. Add flour and sugar and combine on speed 5 for 5 seconds.  Add butter and process on speed 5 for 10 seconds. 
  4. Add egg and mix on REVERSE, speed 4 for 10 seconds.
  5. Press mixture evenly into pie case both into the base and the sides.  Place on a baking tray for stability and blind bake in preheated oven for 20 minutes.  Remove from oven and set aside.
  6. For the filling, place orange and sugar in TM bowl (no need to clean from making the base, just ensure as much of the base has been removed as possible) and blend on speed 9 for 20 seconds.
  7. Add remaining filling ingredients and blend on speed 4.5 for 30 seconds.  Pour over base and bake in the oven for 30 minutes or until set.  The filling will still wobble when you move it however is actually set.
  8. Allow to cool to room temperature before storing in fridge.


Sunday, 13 July 2014

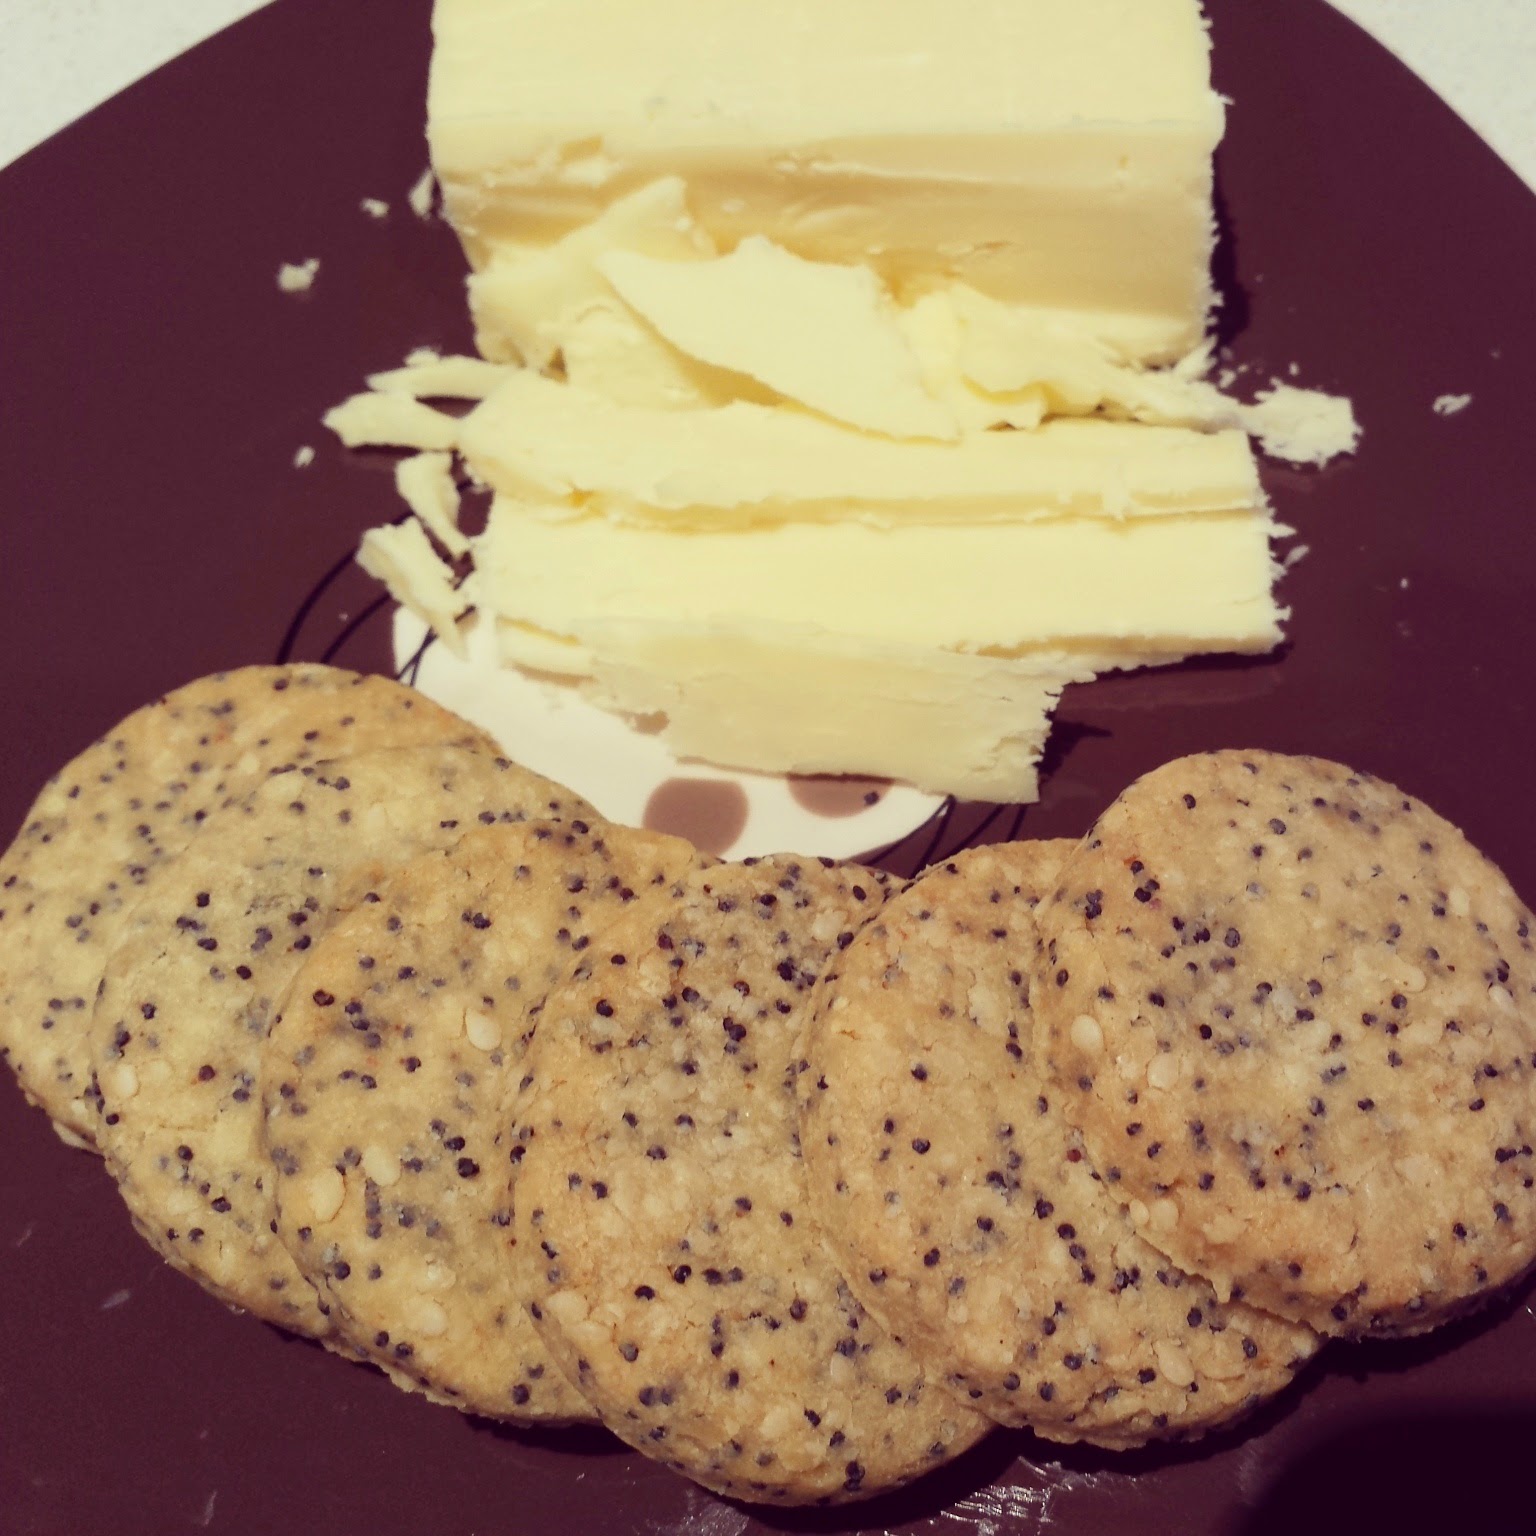
Seeded cheddar biscuits - 'Cheds' style! Gluten and nut free

A big part of my love affair with food are the emotions that come from eating.  Whether it be memories that come flooding back with just one bite, family traditions passed down from generation to generation, love that is felt from ones effort and thought, or even a talent of flavour matching and creation of a dish that gives you no choice when you experience it than to close your eyes and treasure the moment, hairs standing on end.  I've experienced many of these moments.  It's something I live for, something I guess you can't understand unless you feel that way about food too!
So where does this recipe fit in?  Do you remember the age old 'Arnotts Cheds' biscuits?  I'm pretty sure they are still on the shelf actually, I just don't look in that aisle anymore and they contain gluten anyway so are a no-go zone for me!
But childhood memories come flooding back with the talk of Cheds and I am happy for the trip down memory lane!
These days I am much more mindful of what I am putting in my mouth and 'Cheds' have an ingredient list as long as my arm, many of which are not what I would consider to be 'food'!  Check this out....
Wheat Flour (Contains Folate, Thiamin), Vegetable Oil, Cheese (17%) (Milk Solids, Salt) Salt, Malt Extract (from Barley) Yeast, Yeast Extract, Flavours, Glucose, Raising Agents (E500), Rye Meal, Rice Flour, Milk Solids, Spices, Colour (E150D), Antioxidants (E306 from Soy, E304), Emulsifier (E322 (from Soy)).
(Correct at the time of publication)

Hmmm, these ingredients in your or your childrens tummy???  I think not!

These are so easy to make and a little delight that can personalise a cheese platter, compliment a picnic, complete a school lunchbox, satisfy after school hunger pangs, or even make a thoughtful gift for housewarmings, teachers and, well, just about anything really!

So here is the recipe - tell me what you think here or at www.facebook.com/mellymaks and pass your love on to someone you care about in the form of a seeded cheddar bikkie!


Seeded Cheddar Biscuits - gluten and nut free

Ingredients

80g sharp cheddar (I think the secret to this recipe is in the cheese so make sure you pick a really bitey one! I used Mainland Extra Tasty Cheddar)
120g plain gluten free flour (I used Orgran)
20g/2tbs sesame seeds
30g/2tbs poppy seeds
75g butter, chilled
10g/just under 1tbs olive oil
paprika
1 egg white

Method - Conventional

  1. Preheat oven to 180 degrees celcius.  Line two baking trays with baking paper. 
  2. Grate cheese on fine grater or use a food processor and process until relatively fine.  
  3. If using a food processor, add all ingredients except egg white and process until mixture resembles breacrumbs.  If not using a food processor, add cheese to a large mixing bowl with flour, seeds, butter, paprika and olive oil.  Rub together with fingertips until mixture resembles fine breadcrumbs.
  4. Add egg white either to the bowl or food processor and mix or pulse until mix just starts to come together.
  5. Lightly flour bench or pastry mat and bring gently together into a ball.  
  6. With a floured rolling pin, roll mixture out to 1/2cm thickness.  Using a biscuit cutter of your choice, place biscuits onto prepared trays with just a bit of space between them.  
  7. Bake for 20 minutes or until lightly browned.  Place immediately on a cooling rack.  Store in an airtight container once completely cool.

Method - Thermomix

  1. Preheat oven to 180 degrees celcius.  Line two baking trays with baking paper. 
  2. Place the cheese in a dry TM bowl and grate on speed 7 for 5 seconds.
  3. Add flour, seeds, butter, oil and paprika and combine on speed 7 for 3 seconds.
  4. Add egg white and combine on REVERSE, pressing Turbo 3-4 times, or until mixture just begins to come together.  Don't over process or you will lose the flakiness of the finished biscuit.
  5. Pour mixture out onto lightly floured Thermomat or bench top and gently bring together into a ball.
  6. Follow steps 6 and 7 above.
Enjoy..

Tuesday, 6 May 2014

Raspberry Coconut Slice - Gluten Free, Real Raspberries and a Nutritious Lunchbox Filler!

There wouldn't be many people out there who haven't had a slice of the traditional Raspberry Coconut Slice in their life!  Whether it was a staple in Grandma's slice tin or a local bakery favourite, this slice conjures up memories of days gone by.
When this slice popped into my head the other day, I wanted to maintain the traditional flavours and textures of the slice, whilst increasing the nutritional value (as I had planned for this to be a successful inclusion into Master 5s school lunchbox).  So the obvious renovation was to first swap the raspberry jam for just the fruit itself, and then a little tinkering to the base has boosted the fibre, protein, omega 3s, antioxidants and so the list goes on!
If you like things really sweet you may find you want to add a little more sugar, but remember the raspberries add sweetness and for the kids I reckon they are sweet enough!

Easy to make and even easier to eat, this slice is guaranteed to spice up the lunchbox, the morning tea platter at work, or even just the humble cuppa for a rare 'me time' moment! 
If you don't own a Thermie, just use brown rice flour, available at your local health food store and some good supermarkets.  The rest can be made with an electric mixer, food processor, or with a bit of muscle power, bring the tradition right back into this recipe with a good ol' fashioned whisk and wooden spoon!
Enjoy...


Raspberry and Coconut Slice 

Ingredients

100g butter
3/4 cup (120g) + 1/4 cup (40g) rapadura sugar (or coconut sugar, brown sugar)
3 eggs
3/4 cup (150g) brown rice (or brown rice flour)
2 tbs (25g) chia seeds
1/2 cup (70g) gluten free self-raising flour
1/3 cup buttermilk
250g fresh or frozen organic raspberries
2 cups organic desiccated coconut

Method - Conventional 

  1. Preheat oven to 180°C (160°C fan-forced). Line a 3cm-deep, 20cm x 30cm lamington tin with baking paper.  Add chia seeds to buttermilk, stir, and allow to sit until needed.
  2. Using an electric mixer, food processor or whisk/wooden spoon, beat butter and 3/4 cup sugar until light and fluffy. 
  3. Add 1 egg. Beat until combined. 
  4. Sift flours over butter mixture and add buttermilk/chia mixture. Stir gently to combine. 
  5. Spread mixture over base of prepared tin. Evenly place raspberries over mixture. 
  6. Whisk remaining eggs and 1/4 cup sugar together in a bowl. Stir in coconut. Sprinkle mixture over raspberries. 
  7. Bake for 35 to 40 minutes or until light golden. Cool in the tin before slicing.  I've stored mine in the fridge due to the raspberries.

Method - Thermomix

  1. Preheat oven to 180°C (160°C fan-forced). Line a 3cm-deep, 20cm x 30cm lamington tin with baking paper.
  2. Place brown rice and chia seeds in the TM bowl.  Mill on speed 10 for 1 minute.  Set aside. No need to clean the bowl.
  3. Add butter and 3/4 cup sugar to TM bowl and whip on speed 6 until pale.  This will require a few stops and scraping down the bowl.
  4. Add 1 egg.  Blend on speed 5 for 10 seconds or until combined. 
  5. Add flours and buttermilk.  Blend on speed 2 until just combined.
  6. Spread mixture evenly over base of prepared tin.  Scrape as much mixture out of the TM bowl as possible but no need to clean.  Evenly place raspberries over mixture.
  7. Add remaining eggs and 1/4 cup sugar to TM bowl and whiz on speed 4 for 15 seconds.  Add coconut and stir through on REVERSE, speed 1 until combined.  Sprinkle mixture over raspberries.
  8. Bake for 35 to 40 minutes or until light golden. Cool in the tin before slicing.  I've stored mine in the fridge due to the raspberries.
  9.  
     

Tuesday, 8 April 2014

Butterscotch and Pear Gluten Free Tart


This tart would go so beautifully with a cup of tea in the afternoon, or dressed up with a scoop of vanilla ice cream for dessert.
Us Coeliacs don't always get to enjoy sweet treats as most cakes/slices are made with wheat, but when you try this I think you'll agree that there is absolutely no reason why wheat is necessary in this tart, and instead there are plenty of nutrients replacing it!
I have made this base previously with a Stone Fruit Tart, so this is another version and a little more decadent with the addition of a butterscotch sauce.
If nuts are an issue, replace the almonds with sunflower seeds, puffed amaranth or even chestnut meat if it's that time of the year.
Without a Thermomix this recipe can still successfully be made, have a look below for the conventional recipe.
Enjoy...


Butterscotch and Pear Gluten Free Tart

Ingredients

15g Chia seeds
25g chickpeas (or chickpea flour if not using a TMX)
20g flaxseed/linseeds
30g brown rice (or brown rice flour if not using a TMX)
25g raw buckwheat (or buckwheat flour if not using a TMX)
40g raw almonds (or almond meal if not using a TMX)
35g rapadura sugar (or brown/raw/coconut sugar)
20g organic shredded coconut
100g gluten free SR flour
100g butter
2 organic beurre bosc pears

Butterscotch Sauce
65g rapadura sugar (or brown/raw/coconut sugar)
135g cream
1 tsp vanilla extract


Method - Conventional

  1. Preheat oven to 180 degrees celcius.  Line a 20cm springform tin with baking paper and lightly grease the sides.
  2. Peel and slice pears lengthways and set aside.
  3. If you have a food processor, grind up the chia and flaxseeds until fine.  Add the coconut and process until finely chopped. (If you don't have a food processor, just add all flours and seeds in a large bowl and work the butter into the dry ingredients with your fingertips until a fine breadcrumb consistency).
  4. Add flours and sugar and mix to combine.  
  5. Add butter and pulse until thoroughly combined.
  6. Press mixture firmly into prepared tin with your fingers or the back of a spoon to make an even base.  Place the sliced pears evenly over the base.
  7. Place the butterscotch sauce ingredients into a small saucepan and heat, stirring, until sugar has dissolved.  Pour evenly over pears.
  8. Place in preheated oven and cook for approx 45-50 minutes.
  9. Allow to cool in the tin until just warm.  Slice carefully and serve with organic vanilla yogurt, ice cream or cream.

Method - Thermomix

  1. Preheat oven to 180 degrees celcius.  Line a 20cm springform tin with baking paper and lightly grease the sides.
  2. Peel and slice pears lengthways and set aside.
  3. Place chia, flax, chickpeas, rice and buckwheat in TM bowl and grind for 30 seconds on speed 9.
  4. Add almonds, sugar and coconut and grind on speed 8 for a further 5 seconds.
  5. Add SR flour and butter pieces and process on speed 6 until combined (approx 5-10 seconds).
  6. Follow step 6 above. 
  7. Place butterscotch sauce ingredients in the TM bowl (no need to have washed it - just get as much of the base out as you can).  Cook at 90 degrees, speed 1 for 3.5 minutes.  Pour evenly over pears.
  8. Follow steps 8-9 above.


Saturday, 25 January 2014

Carrot cake slice - Nut free, egg free and gluten free

Filling the lunchbox every day is a constant challenge, so I've been told!  I'll find that out first hand this year.  And so given I use nuts in most things I make, it has been a challenge for me to ditch the nuts (during the week anyway!) and to come up with some lunchbox friendly snacks that will still nourish and energize my little man as he takes on each of the days events.


This recipe has no highly processed ingredients, with the bulk of the mix coming from carrots, sunflower seeds and brown rice!  It is also low in added sugar, using dates to sweeten, with just a little help from one of the least processed sugars, rapadura.  Taste the mix before pouring into the tray and if your tastes say 'sweeter please', blend through another couple of dates, some grated apple or sultanas.
I experimented and made a coconut 'icing' to put on top of each slice however you could go more traditional with a cream cheese frosting or even a lemony type icing which would be yummy too!

Of course this isn't just for kids!  Given the ingredients, it would make an energising snack for busy days on the go, between meals, or even with a cuppa and a chat! (or breakfast!).

Carrot Cake Slice - Nut, egg and gluten free

Ingredients

150g brown rice (or brown rice flour if not using a TMX)
30g chia seeds
300g carrots
120g sunflower seeds
1 tsp cinnamon
1/2 tsp nutmeg
40g rapadura sugar
6 medjool dates (or 1/2 cup sultanas)
70g butter

Method - Conventional

  1. Preheat oven to 180 degrees.  Line a slice tray with baking paper.
  2. Place carrots, sunflower seeds and dates in a food processor and blend until almost smooth.
  3. Add remaining ingredients and blend until smooth.
  4. Pour into prepared slice tray and place in preheated oven for 25-30 minutes, or until cooked through.
  5. Cool in tray for 5 minutes then turn out onto a cooling rack.
  6. When cool top with coconut icing (recipe below) or desired topping.

Method - Thermomix

  1. Preheat oven to 180 degrees.  Line a slice tray with baking paper.
  2. Place rice and chia seeds in TM bowl and mill on speed 10 for 1 minute, scraping down once or twice if needed.  Set aside but no need to wash the bowl.
  3. Add carrots, sunflower seeds and dates to TM bowl.  Blend on speed 6-7 for 30 seconds.  Scrape down and repeat.
  4. Add remaining ingredients, including rice/chia flour and blend on speed 6 until completely combined (approx 20 seconds).
  5. Follow steps 4-6 above.

COCONUT ICING

Place a 270g tin of coconut milk in the fridge for a couple of hours (I use Ayam brand).  Once it's cooled through, place 50g organic shredded coconut and 40g rapadura sugar in TM bowl.  Blend until a rough paste forms.  Open the coconut milk can without shaking and carefully spoon off just the solid part (the liquid will be down the bottom) and add to the coconut/sugar mix.  Add the finely grated rind of 1 lime and 1 tbs coconut oil and blend on speed 7 until creamy (there will still be some texture from the coconut), scraping a couple of times.Place in a piping bag and decorate individual cake squares as in the picture above or spread over the whole slice and cut into pieces.  

Tuesday, 7 January 2014

Nut and gluten free fudgy dark chocolate brownie slice


Hehehe I love you guys!!  A bit of chocolate splashed across my Facebook page and before I could blink again it had become one of the most popular posts since, well, the last chocolate recipe!!!  You and I have something in common that is for sure!  A LOVE of all things chocolate! And why not?!  A good quality chocolate recipe can fit perfectly well into a balanced diet.

Chocolate is mood food, comfort food, soul food, endorphin releasing smile food!  Chocolate lovers live it and breathe it.  And when the 'chips are down', chocolate has this uncanny knack of being able to give us a hug, turn up the corners of our mouth, pick us up, brush us off and keep us going.  Any wonder many health professionals out there are calling it a super food!  Damn right it is ( ;

And the closer you get to the natural cacao bean itself, the more you benefit from antioxidants, magnesium, flavenoids, iron, zinc, potassium, copper.....

As Mellymaks regulars know, these days I only use raw cacao powder (instead of the over heated and processed cocoa powder) and minimum 70% dark chocolate.  For Christmas a dear friend of mine gave me a sachet of Loving Earth Drinking Chocolate which is so amazing as it contain cacao nibs in it which gives these beautiful little crunchy pieces while drinking the chocolate milk!  YUM!  When I served this recipe up with homemade vanilla ice cream and strawberries, I sprinkled some of the drinking chocolate over the top which finished it off beautifully!

So given I am officially a new school mum this year, my mind is on nut free recipes at the moment!  This recipe therefore uses sunflower kernels and pepita seeds instead of the traditional walnuts or almonds.  Of course it is also gluten free.  I've also made it more bitter than sweet, but adding just a little more rapadura, or preferably some raspberries to the mix, will increase the sweetness!

If you like a really fudgy slice, reduce the cooking time by a few minutes.  I layered my slice up with ice cream, but a coconut cream, ganache or even a butterscotch sauce would be just as delicious.

I challenge you not to lick the bowl from this one! ( ;

Nut and gluten free Fudgy Dark Chocolate Brownie Slice

Ingredients

85g sunflower kernels
85g pepitas (pumpkin seeds)
140g butter
40g rapadura sugar
150g dark chocolate
35g raw cacao powder
3 eggs

Method - Conventional

  1. Preheat oven to 180 degrees celcius.  Line a slice tin with baking paper.      
  2. Grind sunflower kernels and pepitas in a food processor until fine.  Set aside.
  3. Melt butter, sugar and dark chocolate in a small saucepan over low heat until just melted.  Take off heat.
  4. Add cacao powder and stir through. 
  5. Add eggs and beat with electric beaters for approx 1 minute or until thickened.
  6. Fold through ground seeds.  
  7. Pour into prepared slice tray and smooth surface.  Bake for 25 minutes or until just cooked through.  Be sure not to over cook or you will lose the fudgy centre!
  8. Serve in any of the ways suggested above.

Method - Thermomix

  1. Preheat oven to 180 degrees celcius.  Line a slice tin with baking paper.
  2. Place sunflower kernels and pepitas in TM bowl and grind on speed 9 for 20 seconds.  Dont let it turn into a paste though.  Set aside.  No need to wash the bowl.
  3. Place butter, sugar and dark chocolate into TM bowl and combine on speed 7-8 for approx 10 seconds - enough to break it all up. 
  4. Scrape down sides of bowl and heat at 90 degrees, speed 2 for 2 minutes, ensuring all mixture has melted.
  5. Add cacao and eggs and whip on speed 5 for 30 seconds.
  6. Add ground seeds back into the mix and blend through on speed 4 for 15 seconds.
  7. Follow steps 7-8 as above. 
Enjoy....

Friday, 18 October 2013

Utilising juicing pulp - Ricotta Cakes (gluten free, nut free)

And so it is that I am a huge convert to juicing, if you haven't already noticed on Mellymaks Facebook page!
Earlier this year my hubby and I completed a 3 day detox, created by the team at Food Matters.  It wasn't so much a detox for us but a door which we opened to find the wonderful world of juicing, among other things (such as how much nicer activated nuts are, how little hunger you feel when you actually feed your body with a barrage of nutrients, the deliciousness of chia puddings etc!!).

So back to juicing..... although I had tried it here and there in the past, and actually had a juicer in the cupboard gathering dust (as many of us do!!!) I hadn't felt the benefits of vegetable juice before, and the few commercial varieties that I had tried in the past definitely gave the idea of vegetable juice a bad name for me (think that terrible V8 juice in a can!!).

But a green juice was part of the detox and so we set about buying all the ingredients we needed - cucumber, parsley, lemon, apple, celery, kale and ginger.

Tuesday, 20 August 2013

Breakfast Balls

Breakfast Balls
Some of the most common things I hear about breakfast are 'I don't have time', 'I don't feel like eating first thing in the morning', 'I'm bored of traditional breakfast foods', and 'an hour or so after brekky I am searching for food again'.
Do any of those sound familiar to you?  Sometimes kids can also be difficult customers when it comes to getting a good breakfast into them before school, and plenty of studies have shown a reduction in concentration with a nutrient poor/missed breakfast.

Thursday, 1 August 2013

Raspberry cheesecake ice cream sandwich (with gluten free coconut and almond biscuits)

Hmmm I'm starting to notice a trend with my blog. Ice cream, ice cream, and ice cream!!!  Do you think I like it much?!
Well hopefully you do too. I know these pics would be enough to get me craving ice cream, even on the coldest of days!
Last night I realised I had no cream but in the fridge was a block of cream cheese and some organic yogurt so immediately cheesecake flavoured ice cream came to mind, of course!
So I used my original ice cream recipe but substituted the cream for the cream cheese and yogurt, and when it was almost finished churning, I threw in a couple of handfuls of frozen organic raspberries. Whilst it didn't churn as thick as with the cream, it hasn't frozen icy at all and is actually a lighter, slightly more acidic flavour.  Quite refreshing really.
But what puts it into a league of its own is teaming it up with these little biscuits that quite seriously take seconds to whiz together, thanks, of course to the Thermomix! The recipe is based on the 40 second biscuit recipe found in the EDC Thermomix cookbook but I have made a few changes. Of course any of your favourite bikkies would work just as well - ginger, choc chip, even filling a brandy snap with the ice cream would make an impressive dessert for even the most discerning guest!

Wednesday, 19 June 2013

Black rice, seed and choc chip cookies - gluten and nut free

My eldest son starts school next year and already I think I have heard more about 'lunchbox etiquette' than anything else to do with school!!!

It seems gone are the days when pretty much every lunchbox consisted of a peanut butter or ham sandwich, cheese stick, Prima (Juice Box for many other parts of the country/world!), pack of chips and piece of fruit!  And that's probably a good thing on the whole!

These days you have to be 'nude food' compliant, 'rainbow food' savvy, cold chain compliant, and must have not a trace of nut in sight!  5 days of the week, 38 weeks of the year, 13 years straight! AAAUUUGGGHHHH.  How ever are we going to get out of the door each morning??!!  And will we be accepted by the lunchbox police? ( :

In all seriousness though, the allergy thing is a big one these days, with so many kids administered with an EpiPen in the case of an anaphylactic shock.  So not only do these parents understandably spend so much time and effort keeping their children safe and avoiding nuts, every parent who has school aged kids really needs to be mindful of the products they are sending to school in lunchboxes.  That can be tough for a family not needing a radar for nuts in their life (or any other allergens for that matter).

So given I use nuts a lot, I really wanted to start exploring the nut free world so that next year we can be armed with some yummy homemade snacks that might just win over not only the lunchbox police, but also the nutrition police (me!) and most importantly, the taste police (being my boys!!).

Nutrient wise, when it comes to bikkies, these little guys not only contain a lot less sugar than probably all store bought varieties and many home baked too, but also actually provide goodness, coming from the black rice, sesame seeds and chia seeds!  As I spoke about on Mellymaks Facebook page recently, 'black foods' are a powerhouse of minerals, isoflavones and antioxidants, helping to strengthen the immune system among other benefits.  And milling the whole grain means that not only do you get those immunity benefits, but the fibre and healthy fats from the bran, germ and endosperm!

I spoke a lot about the benefits of seeds in STEP 3 of Mellymaks STEPS program, and the chia seeds and sesame seeds in these bikkies will certainly boost the kids with energy and nutrients galore!

Tuesday, 7 May 2013

Apple and Raspberry teacake - gluten free

It must have been the cold rainy weather we had this morning that made me crave this kind of cake!
And who doesn't love a teacake?!
Memories of Mum and I making apple teacakes with caramelised sliced apple laying delicately on top flooded my mind today, as my own son and I pieced together this little beauty!  But if I'm to be honest with you, Jake was far more interested in pinching the raspberries from the middle and licking the bowl!  Well, who can blame him really?!
As most of you know me quite well by now, you would be reading this waiting patiently to discover which injections of nutrients I have snuck into the mix!  Weeeellllll, it was almost a case of my hands working independently of my mind!  Before I even knew it, chia seeds were being soaked in a cup of brewed tea, almonds were being ground into a meal, and yogurt was dolloped into the bowl!  How did that happen??!!! ( ;

Monday, 8 April 2013

Gluten Free Garlic Focaccia - soft, tasty, easy!

I can hear all my fellow Coeliacs out there reading the title of this post saying 'yeah right - soft, tasty, easy.  Can't be gluten free!'???!!!

I'm super excited to put this recipe together and be able to say 'YES IT IS!!'.  Not only that, but its not all starchy and processed.  I've put linseeds, chia, buckwheat and chickpeas in this mix which gives it real guts, substance and obviously a swag of nutrients!

I think the secret behind the soft texture is the greek yogurt.  The cultures in yogurt do magical things to grains (meats too while I mention it!) to soften and lighten.  Especially given the shorter proving time, I think the yogurt helped the yeast do its thing!

Tuesday, 26 March 2013

Chia cheesecakes with raw and roasted cacao base

Its been a while since I blogged a recipe so I was keen and eager to make my vision for cheesecake with health benefits come to life!
Perhaps it has been the constant smell and talk of chocolate at this time of year that has penetrated my recipe development process, or perhaps there has been SO much chocolate around me that I needed to change it up a bit and work on other flavours...... nah, don't think there can ever be too much chocolate around me!!! ( :
But certainly this is a dessert that you can feel a little better about eating!  Well, with the multitude of benefits from chia seeds, raw cacao, rapadura sugar, raspberries, dates, nuts, raw honey, mesquite powder, cinnamon, cardamon...... I'm thinking there's no guilt involved at all with this 'treat'!

Friday, 31 August 2012

Perfect with a cuppa - Apple Hazelnut cake

I should be trying to tie this post into Fathers Day, shouldn't I?  Hmm, well I haven't perfected my Bourbon soaked shanks recipe yet and I'm not sure an apple tea cake would be at the top of every dads wish list for Sunday!!  Gee, that was a bit sarcastic and stereotypical wasn't it?!  My hubby actually doesn't mind apple tea cake, and quite liked this cake too!

The apples I'm now getting from Petty's Orchard are so tasty at the moment.  When I made another batch of my brown rice and quinoa baby rusks recipe the other day, I actually didn't even need to add sugar as the half apple that you add to the flour was so flavourful and sweet that sugar wasn't needed.

Tuesday, 21 August 2012

Sweet potato, chickpea and chia burgers - Tasty, healthy, oh and did I mention tasty?!

Burgers really are a great comfort food aren't they?!  They are the perfect culinary answer to so many situations - quick meal out with mates, summer picnics in the park, casual meal out with the kids (where you don't generally have to worry how messy they get!), 'refueling' after a big night out on the town, and many more.

Up until a few years ago, burgers were found at either the local fish'n'chip shop or of course at McD's, and were pretty one dimensional - low grade meat patty, bit of lettuce and tomato maybe, white bun and, what am I forgetting???  Oh yes, the quintessential accompaniment, tomato sauce (or ketchup if that's speaking more your language!).  In more recent times, various gourmet fast food establishments have arisen and taken the humble burger to a new level, and consequently reinvigorated our interest.